I left for Moho, but forgot to bring fuel
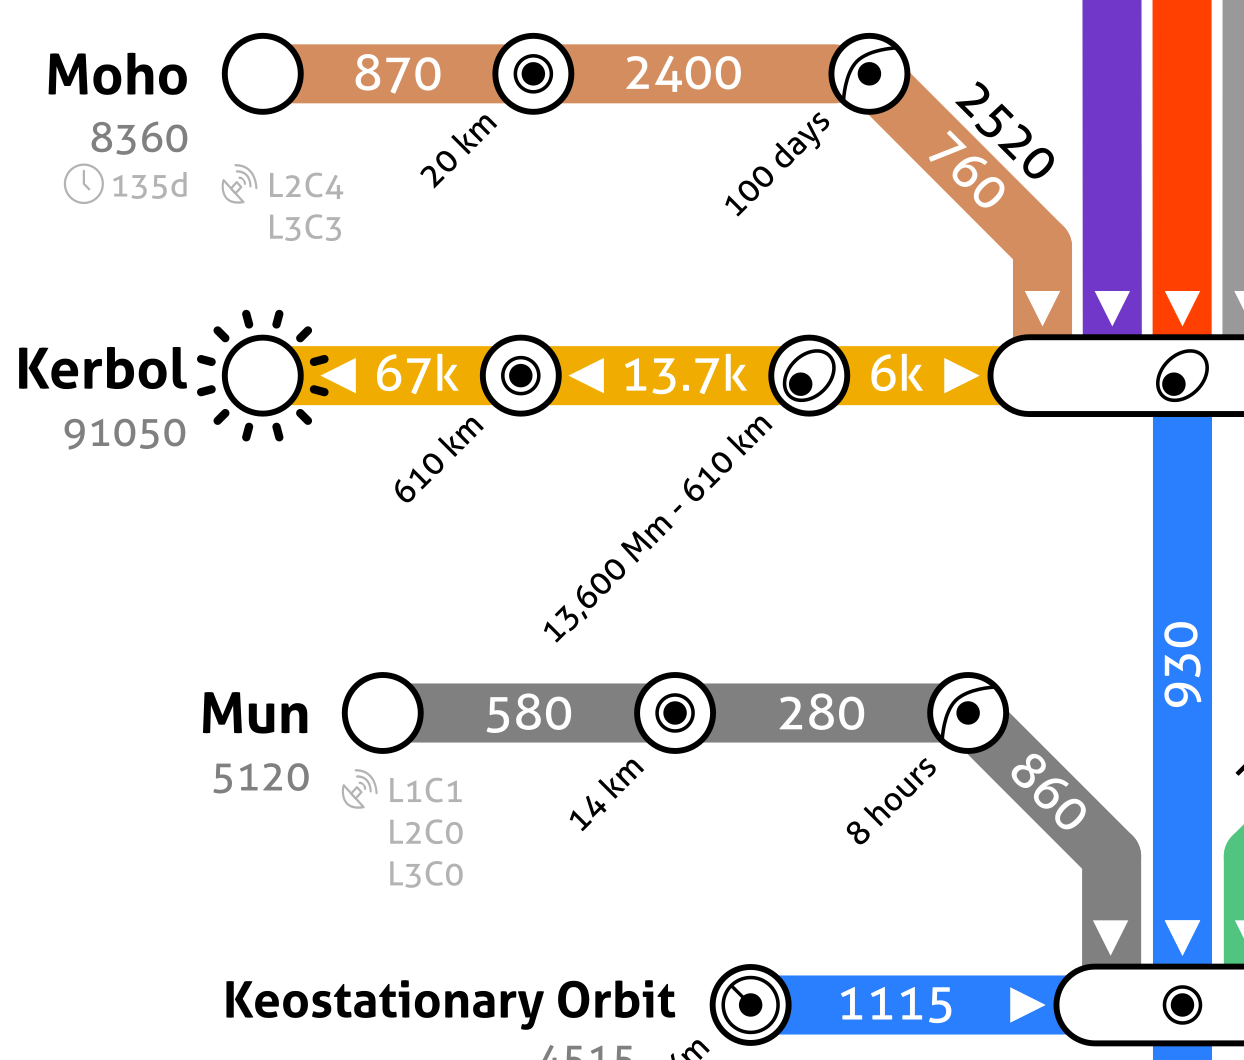
This is a story of a really poorly executed Moho mission. Getting to Moho is hard. If you try do it with a direct Hohmann transfer, then the $\Delta v$ map tells us you need a whopping $16,670m/s$ of $\Delta v$. That’s a big rocket and I don’t want to spend any money. So I’m going to send this rocket instead:
The Rocket
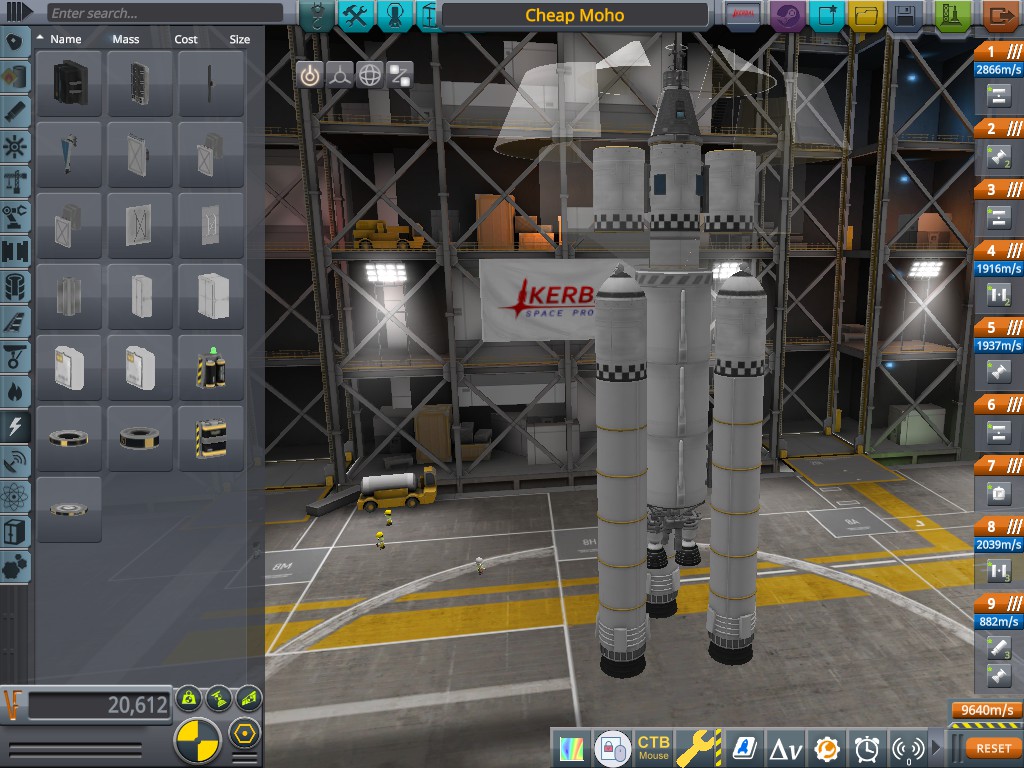
According to the VAB, the rocket has $9640m/s$ of $\Delta v$ broken down as follows
- $883 + 2039 = 2935 m/s$ for the lifter.
- $1937 + 1916 = 3853 m/s$ for the transfer stage
- $2866 m/s$ for the lander. The lander actually has $1909m/s$ of $\Delta v$ on board, but the VAB shows a higher number because there is no kerbal in the chair.
All in all, to get to Moho and back, we have three FL-T400 fuel tanks and a terrier, which gives $3,853 m/s$ of $\Delta v$. This is a little short of the $11,530m/s$ that we need according to the map. I’m going to go anyway and see what happens.
Aside: Gravity assists
To get to Moho, I’m going to use a lot of gravity assists. When you pass by a planet, it bends your trajectory. Bending your trajectory changes your velocity. Normally you would have to fire your engines to change your velocity. Therefore passing by a planet gives us $\Delta v$ for free.
Most tutorials for gravity assists online say to “just play around with maneuver nodes and you’ll get better at it” but I don’t find this answer very satisfying. Instead I have distilled the following 6 rules to help me plan what assists to use before I take off:
- You enter a sphere of influence with the same speed you exit
- If you do two assists in the same location, you will enter the second assist with the velocity you exited the first
- The greater the mass of the body, the more it can bend your trajectory in a single assist
- The greater the relative speed, the more you can get out of assists
- High inclinations and oblique angles means greater relative speed
- Fly to where you want the encounter to be, rather than where the planet is.
Getting to Eve
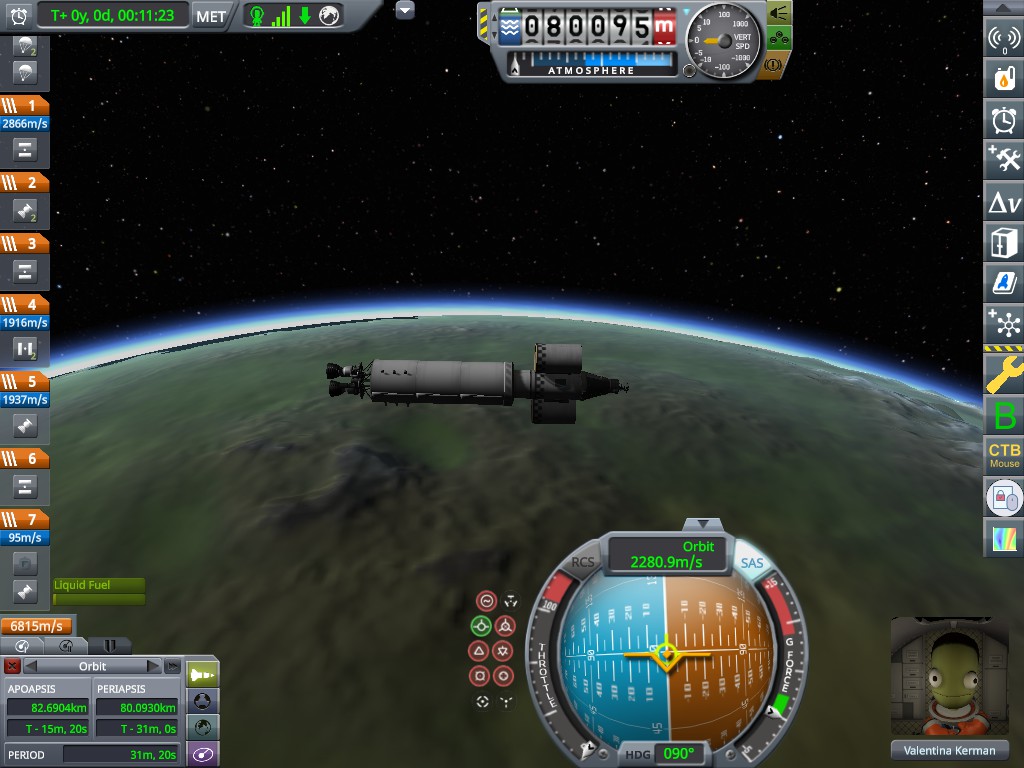
Firstly, I take off from Kerbin. With a decent ascent, I am left with $95m/s$ of $\Delta v$ on the main stage. I don’t wait for an Eve transfer window. Instead I want to use rule #6
6. Fly to where you want the encounter to be, rather than where the planet is
I want to use Eve to perform an inclination change, and to do that, Eve needs to be at the ascending or descending node of Moho.
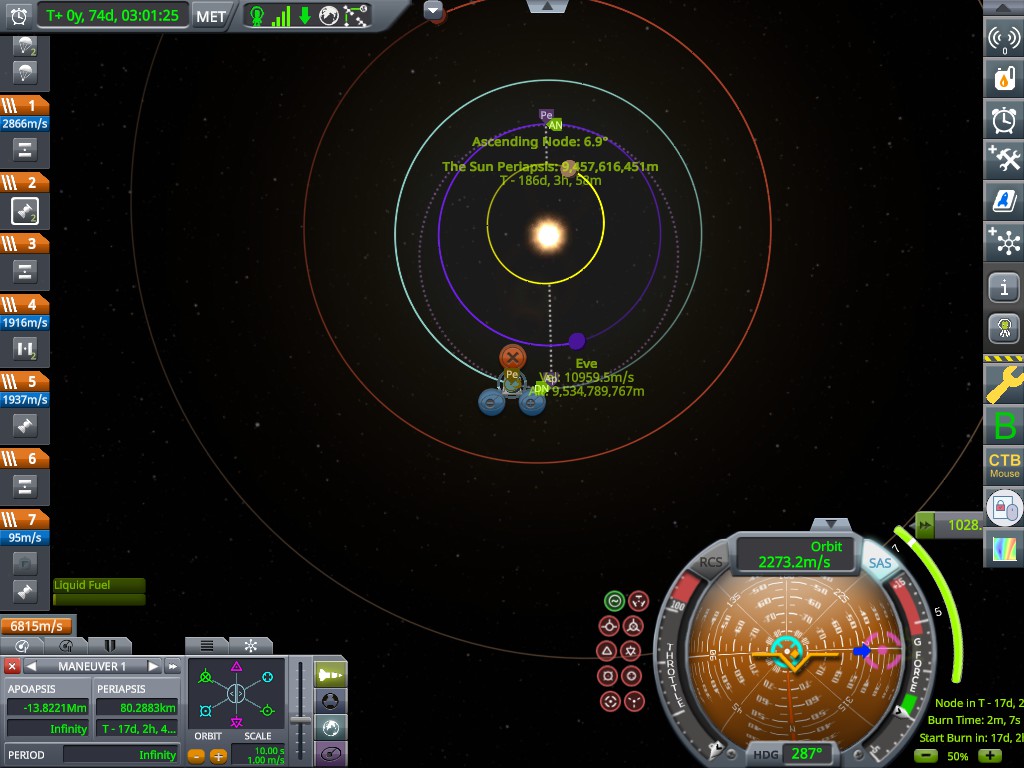
To get an Eve encounter, I create one maneuver node where my orbit intersects Eve’s, and a dummy maneuver node where I use the “+/- orbit” buttons to search forward a few orbits for close encounters. This means I can make a small burn to get an encounter anywhere along Eve’s orbit. When doing precise burns such as this one, it helps to set the thrust limiter on the engine to 1%.
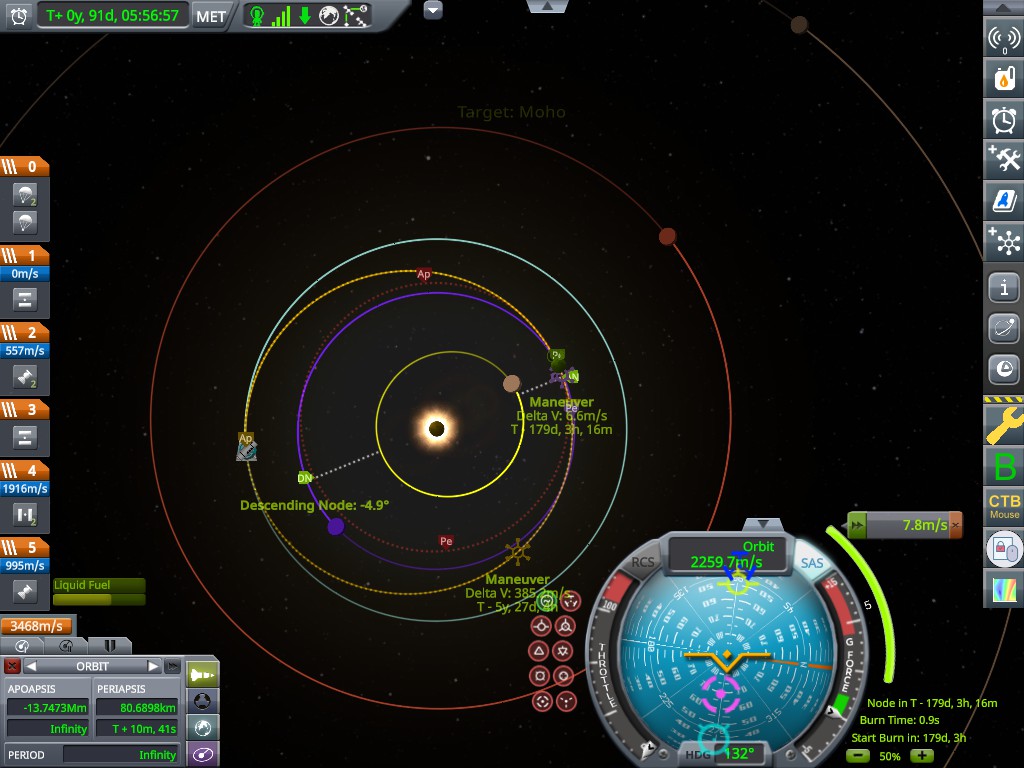
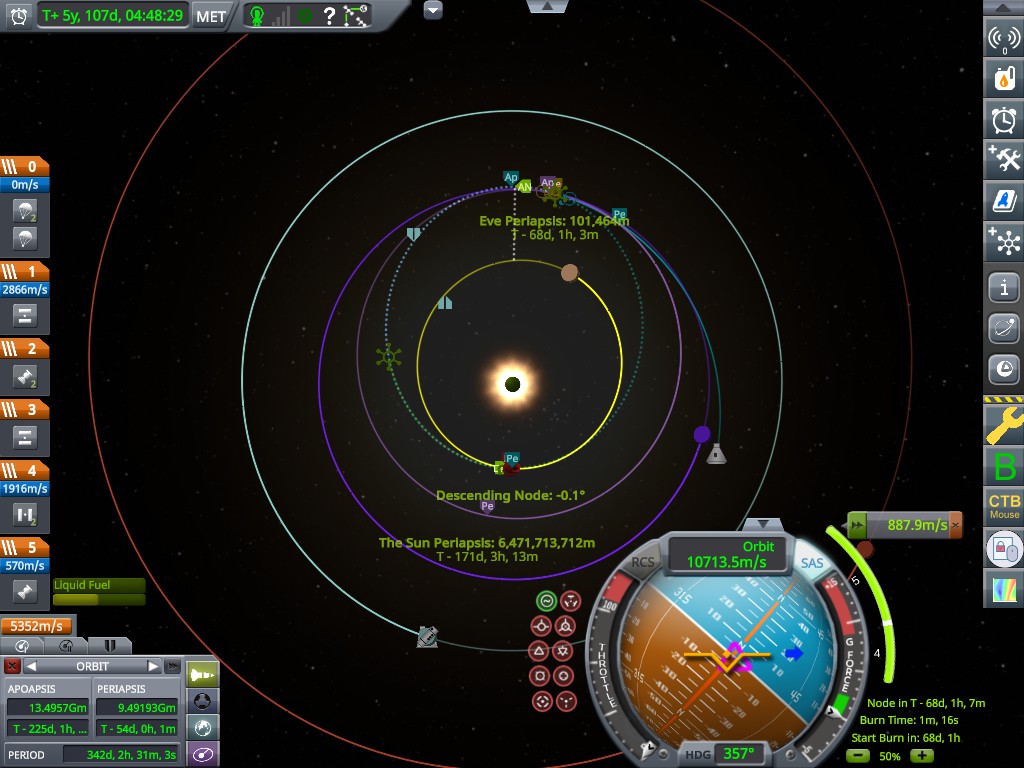
When I intercept Eve, I have a larger orbit. That means I will be going faster than Eve. To get to Moho, I want to go slower than Eve. Basically I want to perform a U turn around Eve so that all of my forward speed is converted into backwards speed.
I burn $887m/s$ of $\Delta v$ close to Eve to get a Moho Encounter. In tital, I use $2354 m/s$ to get a Moho encounter from Low Kerbin orbit. This is a saving of $1876 m/s$ compared to a direct transfer.
Eve to Moho
Once I have a Moho intercept, I want to kill as much relative velocity as possible. On the surface this seems impossible due to rules #1 and #2 which imply that no matter how many assists I do, I will always end up with the same relative velocity.
1. You enter a sphere of influence with the same speed you exit 2. If you do two assists in the same location, you will enter the second assist with the velocity you exited the first
I can use a Moho assist to lower my apoapsis, but this also causes the orbit to become more oblique. The net result is that my relative velocity is unchanged, and I am back to square one.
Luckily for me, I can use rule #5 in reverse:
5. High inclinations and oblique angles means greater relative speed
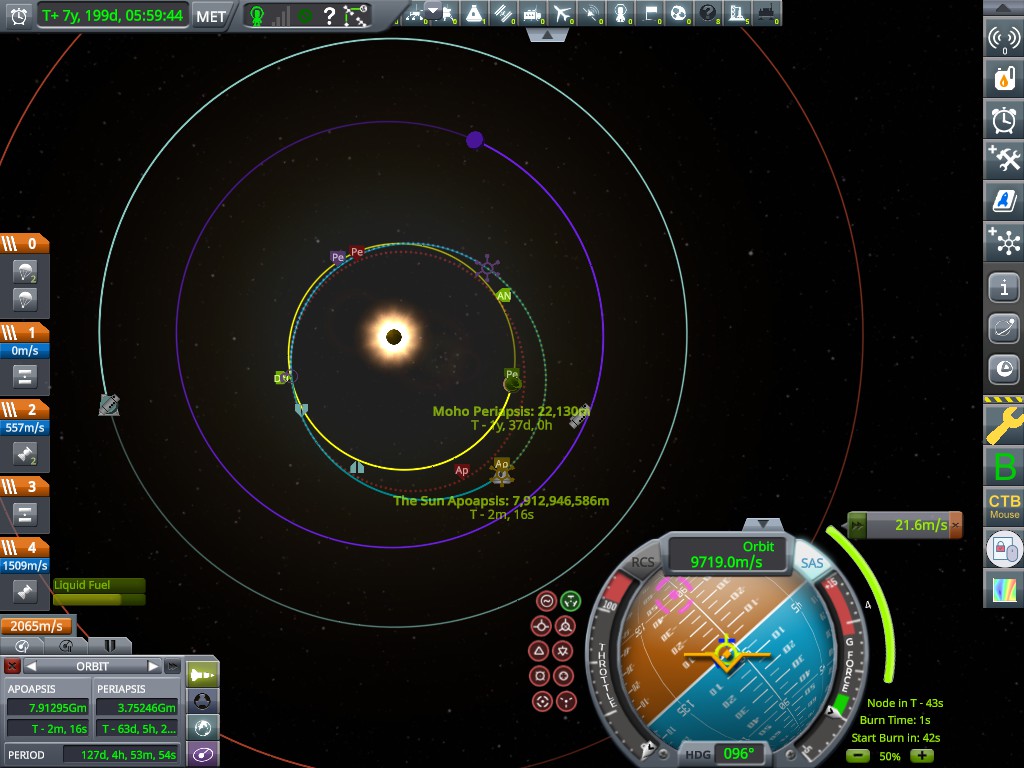
If high inclinations and oblique angles mean larger relative speed, then low inclinations and narrow angles mean low relative speed. I can perform deep space prograde burns at apoapsis to reduce the angle of intercept, and reduce my relative velocity.
Therefore, I can alternate assists and deep space burns to descend to Moho efficiently. I double dip and use the deep space burns to get Moho intercepts, so I don’t waste much fuel. I have to do three or four of these maneuver to get my relative speed down to something acceptable.
Using a lander
When I get to Moho, I can send down a small lander instead of landing the whole ship. This is a basic technique that you can use anywhere to give a good $\Delta v$ saving.
Additionally, it takes 310 m/s of $\Delta v$ to circularise my orbit once I capture into Moho. If I detach the lander in an elliptical orbit, I can save another chunk of mothership fuel at the expense of fuel in the lander. Again, this is a good choice to save $\Delta v$.
Rendezvous in an elliptical orbit is a bit harder, but not impossible. I can use the same technique we use to get an encounter with a planet. One maneuver node where you want the intercept, and another maneuver node to search a few orbits ahead.
This is made more difficult by the fact that the lander doesn’t have enough fuel. I need $(310 + 870) * 2 = 2360 m/s$ of $\Delta v$ but my lander has $1909m/s$ of $\Delta v$ onboard. I’m going to have to use the EVA jetpack to make orbit and rendezvous, which means no maneuver nodes.
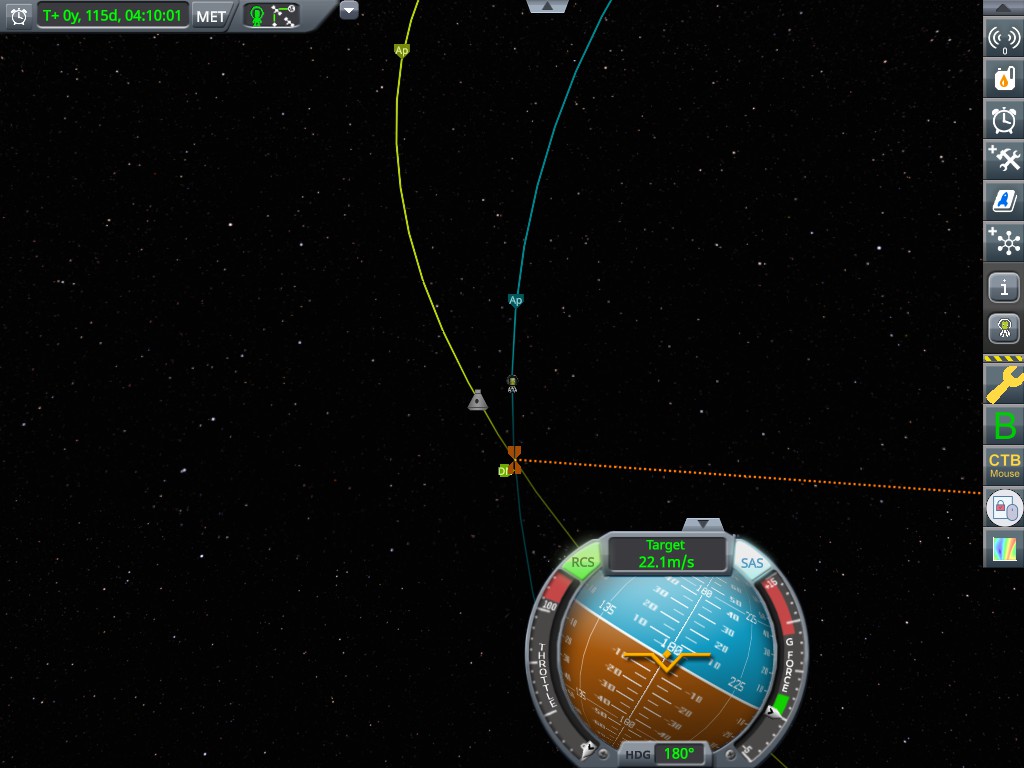
I just make the rendezvous with fumes in the EVA jetpack tank. I had to use some of the mothership fuel to make the rendezvous, but that’s OK. Next time, I know to bring extra EVA jetpack fuel.
Getting Back
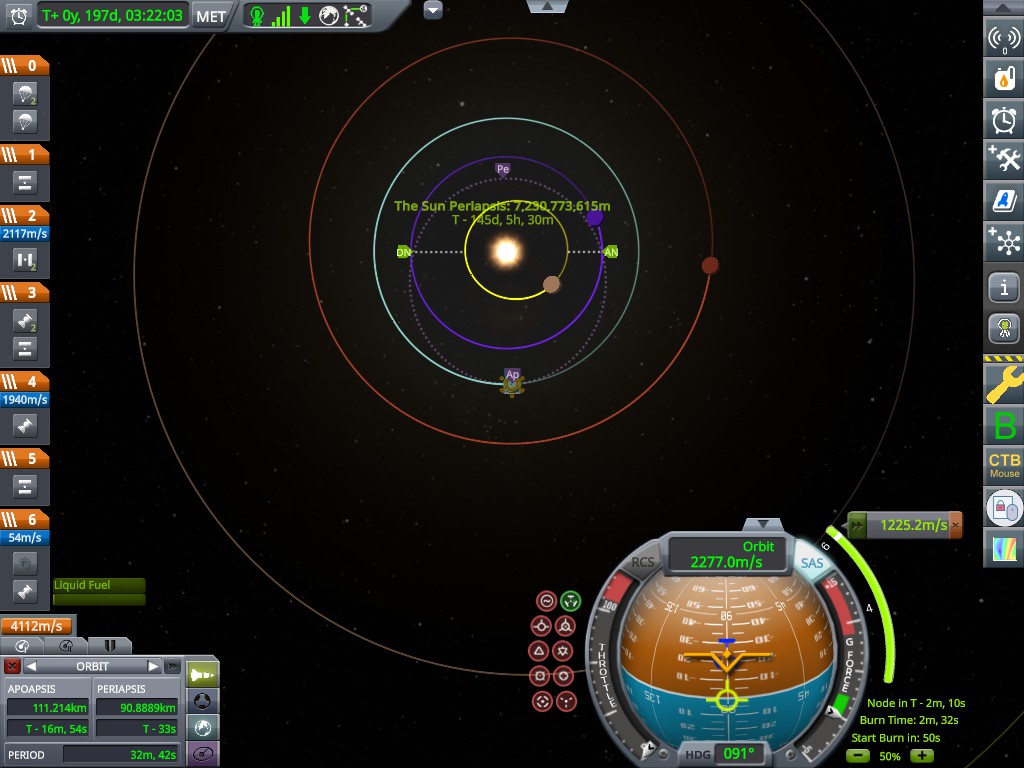
Moho assists can be used to get back, I simply apply the Moho descent technique in reverse: burn retrograde at solar apoapsis to get a Moho encounter, and then use the encounter to raise my apoapsis. Repeat as many times is necessary to get the orbit to the level of Eve.
Once I have an Eve encounter, I can use that to assist to raise my orbit to the level of Kerbin. In some cases, I’ve needed two Eve assists to do this, but in this run, I managed it with only one assist. Once I have a Kerbin encounter, I can aerobrake down to the surface, as long as I have heat protection
As long as I have heat protection
I get a Kerbin encounter with $209m/s$ of $\Delta v$ to spare. This is plenty if your heat shilds work, which they didn’t. The RC-001S sticks out to the side and overheats, destroying the whole craft. Instead, I aerobrake at the lowest altitude possible using the terrier as a heat shield.
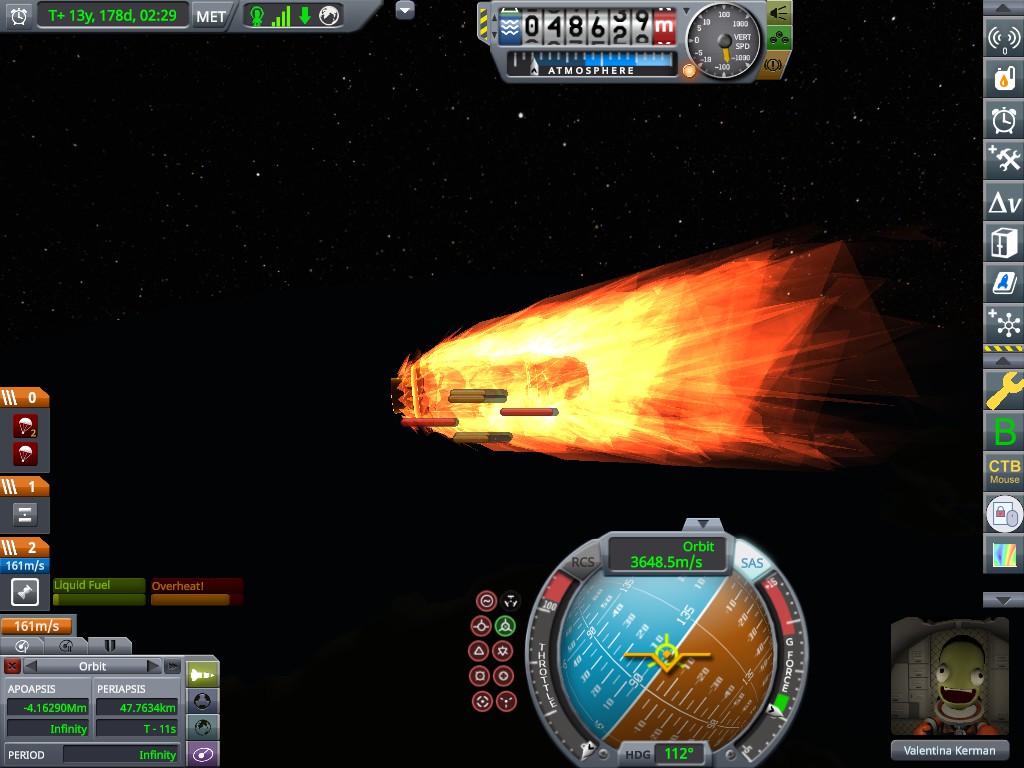
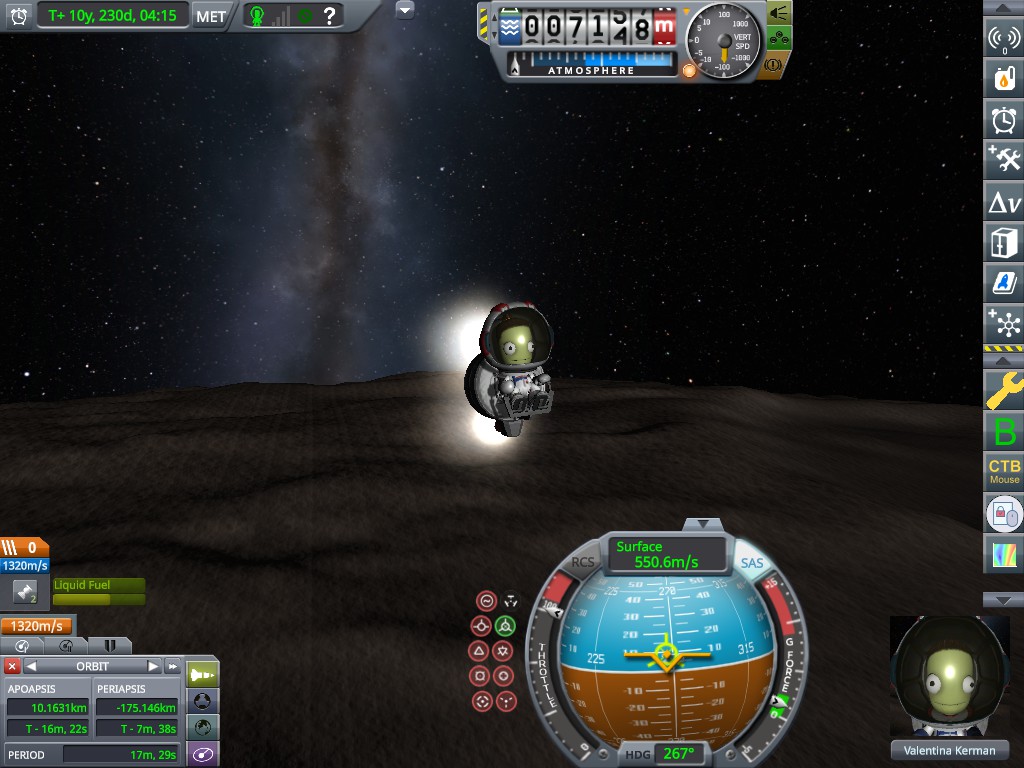
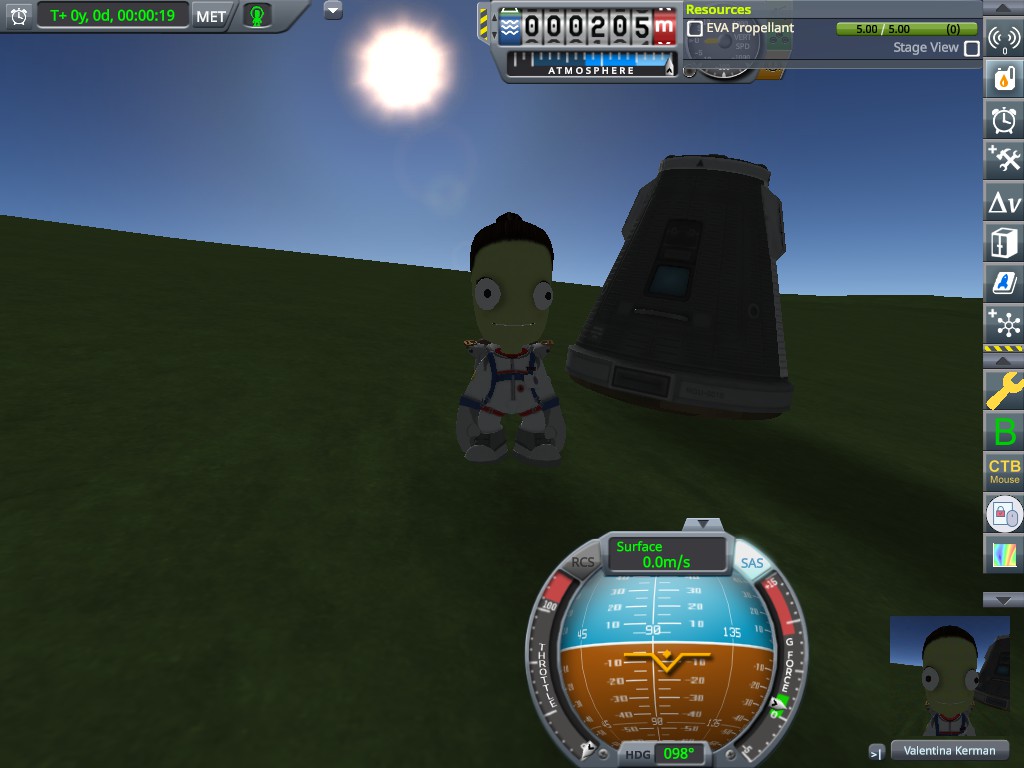
After spending all of my $\Delta v$ slowing down, it’s still not enough, so I get out and push the craft to get a Kerbin capture. After multiple aerobraking passes, I finally touch down at last. After 30 years in the command pod, Valentina is finally home.
Post Mortem
With any terrible mission, we should reflect on what we can do better and improve it for next time
Bring extra EVA fuel
For dubious missions like this one, it’s always a good idea to bring extra EVA canisters. This gives you an extra $300m/s$ of $\Delta v$ to work with in the jetpack at the expense of not having a personal parachute. If you still want a parachute for safety, put it in the command module inventory and equip it before re-entry in case you need to bail out.
Note: if you do ever have to bail out, don’t forget to take your science with you!
Use larger heat shields
The RC-001S extends past the outside fo the 1.25m heat shield, making it effectively worthless. Testing reveals that a 1.875m heat shield protects the core sufficiently for re-entry. Alternatively, you can drop the probe core with the terrier engine.
In general, using heat shields with the exact diameter of the part it protects is dicey, since you are unprotected if the craft tilts to one side for any reason. Command pods are an exception, since they are conical in shape.
Unpowered Eve assist
To get to Moho, I used a powered Eve assist, but ignored rules #4 and $5:
4. The greater the relative speed, the more you can get out of assists 5. High inclinations and oblique angles means greater relative speed
If I increase the angle between my orbit and Eve’s, I give myself more relative velocity to work with and I can use an unpowered assist instead. This costs me about $200m/s$ of $\Delta v$ during my escape burn from Kerbin, but saves the $890m/s$ burn at Eve.
Overall, I got a Moho encounter from low Kerbin orbit in $1524m/s$. This is a saving of $2706m/s$ compared to a direct Hohmann transfer and $830m/s$ compared to a powered assist.
Summary
Using gravity assists, a lander, and the EVA jetpack, we save a lot of delta V getting to Moho. This allows us to send a really cheap rocket there and back. A summary of the techniques used are as follows:
| New technique | Cost | Old technique | Cost | Saving |
|---|---|---|---|---|
| Eve powered assist | $2354m/s$ | Kerbin to Moho Hohmann transfer | $4230m/s$ | $1876m/s$ |
| Eve unpowered assist | $1594m/s$ | Kerbin to Moho Hohmann transfer | $4230m/s$ | $2636m/s$ |
| Moho self assist capture | $686m/s$ | Moho capture burn | $2100m/s$ | $1414m/s$ |
| Moho self assist escape | $778m/s$ | Moho to Kerbin Hohmann transfer | $2100m/s$ | $1632m/s$ |
| Bring a lander | $225m/s$ | Land the whole ship | $1740m/s$ | $1515m/s$ |
| Only circularize the lander | $0m/s$ | Circularize the whole ship | $620m/s$ | $620m/s$ |
| Use Eva Jetpack | $0m/s$ | Use lander engines | $600m/s$ | $600m/s$ |
As with anything in KSP, poorly planned missions sometimes still work out anyway. Nothing that EVA jetpack fuel, gravity assists, and engines-as-heat-shields can’t solve.